Hei.
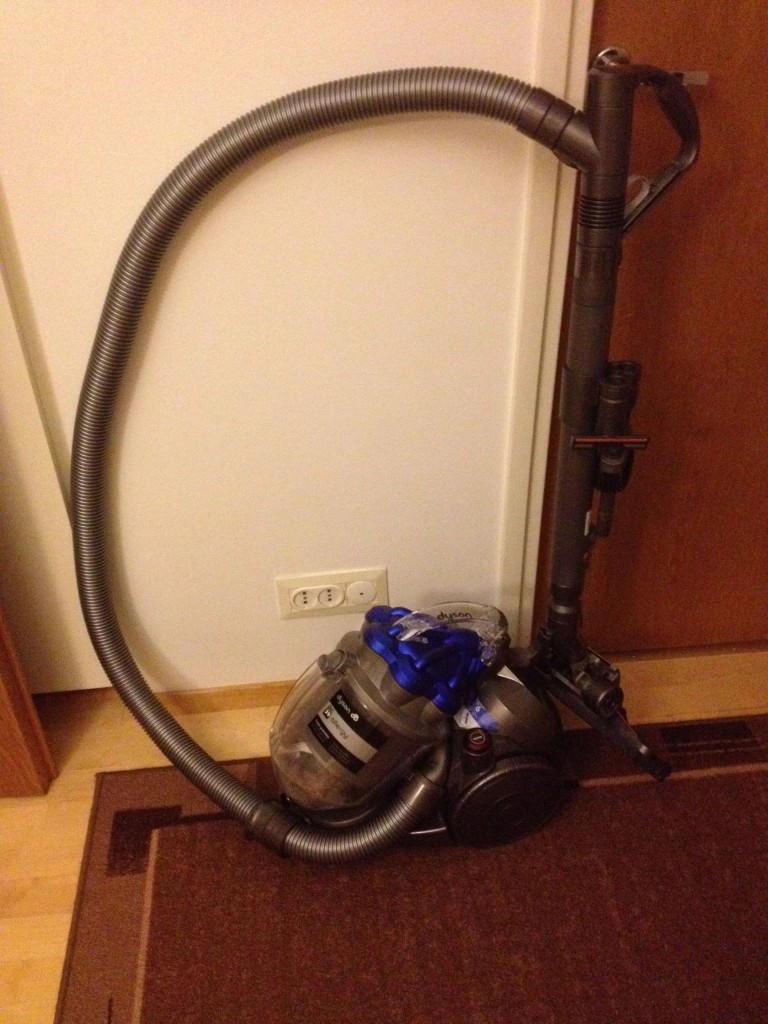
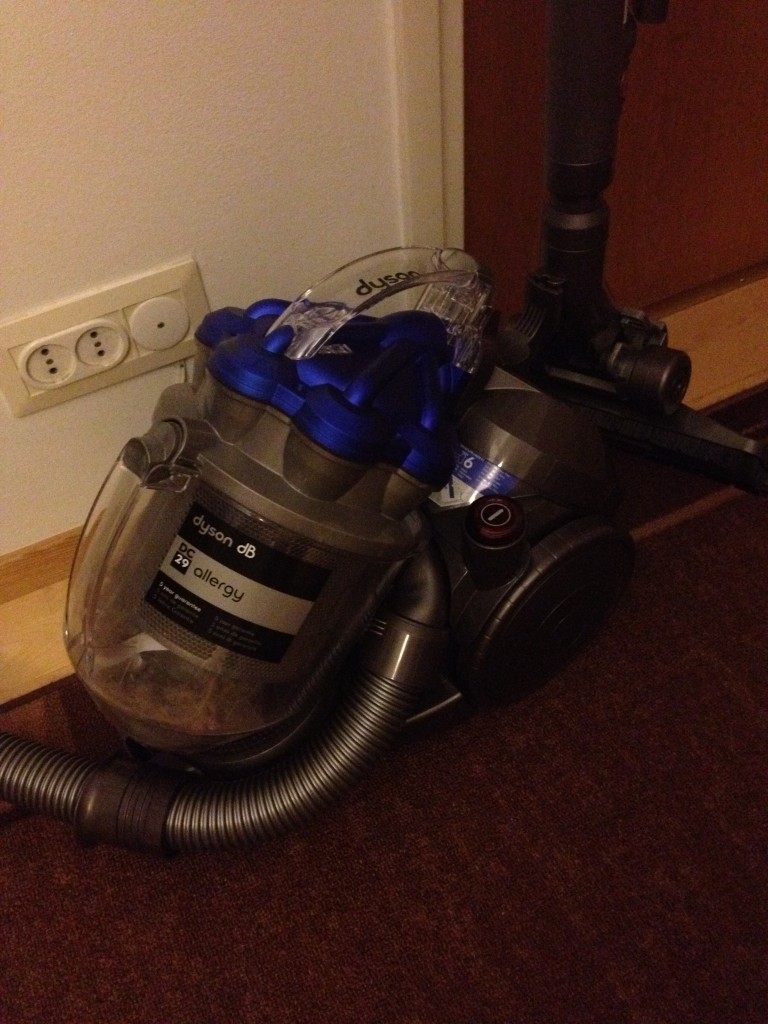
Tällä kertaa meillä on siivoukseen liittyvä mulkaus eli Dyson DC 29 Allergy imuri.

James Dyson (englantilainen) kehitti 1978 ensimmäisen pölypussittoman pölyimurin, jossa käytetään keskipakovoimaa pölyn erottamiseen. Silloisella imurilla oli hintaa 2000 dollaria ja sitä myytiin High-Tech tuotteena Japanissa. Sen jälkeen hän alkoi kehittää Englannissa seuraavaa versiota, joka olisi kuluttajahintainen. 90-luvun alkupuolella hän saikin sitten ulos Dyson Dual Cyclone™ tekniikalla toimivan imurin. Nykyiset ja arvosteltavana oleva malli on kuitenkin vielä kehitetty pidemmälle ja tekniikka kantaakin nimeä Root Cyclone™.
Dysonin tiedemiehet olivat päättäväisiä kehittämään pölynimuria, joka olisi entistä tehokkaampi. Siispä he ryhtyivät suunnittelemaan täysin uudenlaista syklonijärjestelmää. He huomasivat että pienempi syklonin halkaisija tuottaa suuremman keskipakoisvoiman. He saivat aikaan 45% enemmän imutehoa kuin Dual Cyclone:ssa jakamalla ilman 8 pienempään sykloniin, siitä nimi, Root 8Cyclone™
Yritän nyt jotenkin selittää tuon tekniikan kansankielellä niinkuin olen itse sen ymmärtänyt. Elikä imuri imee ilmaa sisäänsä ja pölyt sen mukana. Säiliössä pyörii hirmuinen pyörre, joka heittää sitten kaikki pienhiukkasista lähtien ulompaan astiaan, joka toimii roskasäiliönä. Loppuilma sitten puhalletaan ulos. Ulostuloilman pitäisi siis olla erittäin puhdasta. Dysonin sivuilla myös kerrotaan, ettei imuri menetä ollenkaan imutehoaan kuten pölypussilliset menettävät ikääntyessään.
Dyson imureiden jälkeen on toki tullut muitakin pölypussittomia merkkejä, mutta jostain syystä tätä pidetään sellaisena pro-mallina. Lähdimme siis selvittämään miksi tämä on niin hyvä vai onko sittenkään maineensa arvoinen. Meillä sattui vanha kaukosäätöinen Electroluxin imuri päättämään päivänsä viimeiseen yskäisyyn ja jouduimme hankkimaan uuden. Olimme oikeastaan hakemassa vastaavaa uutta mutta meidät saatiin kuitenkin puhuttua ympäri kaikilla kehuilla ja sitten hankimmekin tämän Dyson DC29 Allergy mallin. Lukiessanne tätä arvostelua pitäkää siis mielessänne että vertaan Dysonia tuollaiseen imuriin.
Käyttäminen
Noniin imuri saatiin kasattua hyvinkin nopeasti, koska kyseessä ei ollut mikään palapeli. Putki paikoilleen ja suuttimet siihen. Siinä oikeastaan kaikki. Johto seinään ja rock ’n roll. Dysonissa on tasan kaksi nappia ja nekin aika isoja. Toinen on johdon sisäänvetämistä varten ja toinen käynnistämistä/sammuttamista varten. No mistäs sitten säädetään tehoa? Vastaus: Ei mistään.

Laitoin imurin käyntiin ja ensimmäinen minkä huomasin oli se, että imuri piti kovempaa ääntä kuin vanha. No tietysti jos vanha olisi ollut täysillä niin se olisi huutanut vielä kovempaa mutta siinä sai imurin hiljenemään kaukosäätimestä. Ääni ei ollut kuitenkaan niin suuri, että imuria olisi pitänyt lähteä kiikuttamaan takaisin kauppaan vaan siihen tottui hyvin pian. Myyjät sitäpaitsi järjestäin kertovat pölypussittomien imureiden suuremmasta äänestä. Imurin varressa on oikeastaan vain yksi säätö ja se säätää varren pituutta. Vapautin on jämäkän oloinen ja säätyminen tapahtuu hienosti ja pehmeästi. Jos olet nykyisessä imurissasi tottunut pitämään kiinni putkesta tai siinä kiinni olevasta kahvasta niin tässäkin on kahva mutta putken yläpuolella. Itselleni tämä vaati hieman tottumista mutta pian huomasin sen olevan aika kätevä. Imurin päätä sai käänneltyä hyvin ja jopa ruokapöydän alta imurointi sujui hienosti vaikkei olisi edes siitänyt tuoleja.
Varsi on muovia, suutin on muovia ja se loi ensin hieman ”heppoisen” vaikutelman. Eiköhän ne kuitenkin aika kestäviä ole kun kerran uskaltavat antaa imurille 5-vuoden takuun. Tämä selvinnee kuitenkin vasta myöhemmin vuosien saatossa. Imutehoa laitteessa tuntuu riittävän ja kun päästään maton päälle, ei imuri tartu siihen kiinni. Harjojen alas laitto onnistuu helposti jalalla tai vaikka varpaalla ja mikäli kyseessä on jokin herkempi matto, niin varressa on sellainen liipasimen tapainen säädin, jolla osan imuilmasta saa pois. Näin imuri ei ime ihan niin lujaa. Tavallisissa matoissa tuota ei tarvinnut silti käyttää. Edellisessä kuvassa muuten näkyy myös mihin ne pölyt päätyvät. Työn jäljen voi siis selkeästi nähdä. Lapsiperheissä tämä mahdollistaa myös helpomman tavan ottaa talteen niitä imuroituja leluja tai palapelin palasia.
Tyhjentäminen
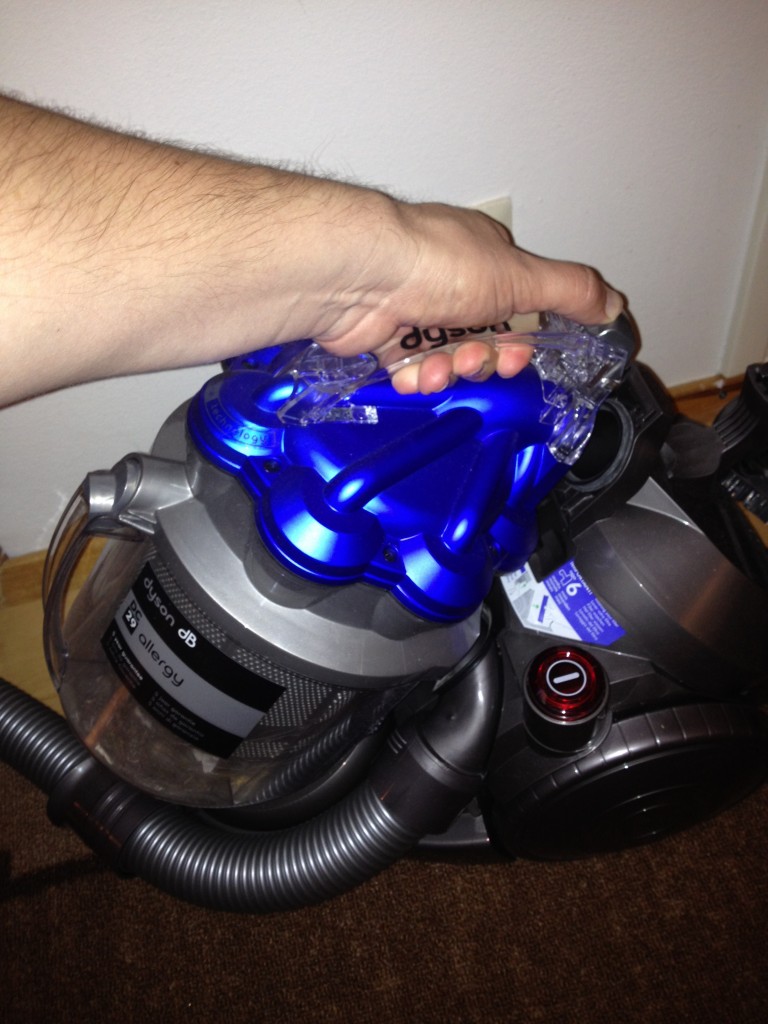
Tähän ei varmaankaan ole olemassa mitään sertifioitua tyhjentämistapaa mutta kokeilin nyt seuraavanlaista (joka tosin sai minut pari kertaa aivastamaan). Ensinnäkin koko säiliösysteemi lähtee imurista irti painamalla ylempää nappia.

Säiliö lähti irti varsin hienosti ja helposti, itseasiassa helpommin kuin normaali-imurin luukun saa auki. Tämän säiliön kanssa sitten mennään tyhjennyspaikalle. Itse kehitin sellaisen systeemin, että kun painoin alempaa nappia ja sain pölysäiliön irti suodattimesta, ujutin roskapussin säiliön päälle ja käänsin yhdistelmän ympäri. Sitten suljin pussin suun tiukasti ja vedin sen pois säiliön päältä. Näkyvästi ei pölyä tullut yhtään pussin ohi, mutta luulen suodatinosaan jääneen pölyn hieman aivastuttaneen minua. Ehkä se sitten on pieni haitta siihen nähden, ettei enää tarvitse ostaa pölypusseja ja ihmetellä kun ne on kaikki loppu juuri silloin kun pitäisi imuroida ja vieraatkin on tulossa tunnin päästä. Säiliö naksahti tarkasti takaisin omalle paikalleen imurin päälle. Sitten vaan imuroimaan lisää.
Lopuksi hieman plussia ja miinuksia:
+ Ei pölypussien ostoa
+ Ei menetä tehoaan
+ Puhdistaa tehokkaasti
– Äänekkäämpi kuin pussilliset imurit
– Aluksi muovisuus toi jotenkin halvan vaikutelman
– Säilytyksessä hieman heiluvainen koska ei paina paljon.
Tällä siis mennään toivottavasti ainakin seuraavat 10 vuotta. En kadu ostamista ja jokaisella imurointikerralla olen pitänyt tästä enemmän. Se, että saako tämä sitten imuroimaan useammin onkin täysin toinen kysymys.
English
Hi.
This time our quick glance is about cleaning, or vacuuming because this is about Dyson DC 29 Allergy vacuum cleaner.

James Dyson (an Englishman) developed 1978 the first dustbag free vacuum cleaner and it used centrifugal force to differ dust from air. That vacuum cleaner cost 2000 dollars and it was sold in Japan as a High-Tech product. After that he started to develop in a factory in England a new version which would be prized more customer friendly. At the beginning of 1990 he came out with a Dyson vacuum cleaner with Dual Cyclone™ technology. Nowadays and the one we tested is even more advanced version and it uses a technology called Root Cyclone™.
Root Cyclone™ technology uses powerful centrifugal forces to separate dust from the air. New Dyson cylinder machines have three distinct stages of cyclonic separation – each engineered to capture smaller and smaller particles.
Air velocity is: 20 metres per second in the outer cyclone, 50 metres per second in the core separator, 80 metres per second in the inner cyclones. Dust particles are subjected to forces of: 500G in the outer cyclone, 29,000G in the core separator and 100,000G in the inner cyclones (around 20,000 times greater than a roller-coaster ride).
So I’ll try to explain it as I understand it. The vacuum cleaner sucks in air (and all the dust with it). There is a big cyclone going round and around in the tank and it throws all the dust to the outer can. The rest of the air is blown out. The air blown out should be very clean. They say on Dyson’s website that this vacuum cleaner doesn’t lose its power ever.
After the Dyson vacuum cleaners some other marks have also brought their models without a dust tank but for some reason Dyson is thought as a pro-model. So we went and tested why this is supposed to be so good or does it live up to expectations after all. We had an old Electrolux vacuum cleaner that had a remote control and it died. We tried to find a new similar one but was talked over to get a Dyson, so we bought this DC29 Allergy. As you read this article, keep in mind that I compare it to a normal Electrolux.
Usage
So we were able to assemble it rather quickly because it wasn’t actually a puzzle. Attach the rod and the nozzle and that’s it. Plug it in and rock ’n roll. Dyson has only 2 buttons, one to retract the cord and one to power on/off. So how do you adjust the power? Answer: You can’t.

I turned on the vacuum cleaner and the first thing I realized was that it was making louder noise than the old one. Naturally if I had kept the old one at max power, it would have made even more noise but I didn’t. The noise wasn’t so loud though that I would have packed this up and brought it back to the store I bought it from. I got used to it pretty soon. Besides all the sales person told me that all the vacuum cleaners without a dust bag are making bigger noises. There was only one switch on the rod and it adjusts the length of the rod. The lever is firm and adjusting is smooth. If you are used to hold your current vacuum cleaner from the rod or from a handle in it, the handle in this one is on top of the rod and it needs getting used to. Soon you’ll find it very handy and you can move the nozzle very easily around obstacles. You could even vacuum from under your dinner table very easily without even moving the chairs.
The rod is plastic, nozzle is plastic and that brought a kind of cheap feeling at first. I’m sure that they are durable though because they even give you a 5-yeah warranty. If that is true, I will find it out later. The suction in this device is rather good and when you get on the carpet, it doesn’t stick in to it but glides on it. You can put the brushes up or down by foot or even by your toe. If you are vacuuming a sensitive carpet, there’s a tricker like thing in the rod and when you press that, some of the air is coming out resulting less suction. On normal carpets you don’t even need to use that. You can see in the picture above where all the dust is going. So you can really see the results of your work. If you have kids, its easier to recover toys and puzzle pieces from this than from the one with a dust bag.
Emptying
I don’t think this has any certified way to empty the tank but I tried the following way (which made me sneeze a few times). First of all you can detach the whole tank system from the vacuum cleaner by pressing the upper button.

The tank detached very easily and nicely. Actually it was easier than opening the hull in a normal vacuum cleaner. So you take the tank and go where ever you want to empty it in. I developed a system that when I pressed the lower button to detach the dust tank from the filter thing, I put a plastic trash bag over the dust tank and turned it over. I pressed the bag tight on the tank and removed it closing the bag at the same time. No dust came through but I think the sneezes came from the little dust left on the filter. Maybe just a minor thing compared to that you don’t have to buy any dust bags and wonder why there are none when you should clean and there are visitors coming in an hour. The tank clicked back into place nicely. More vacuuming then.
Then some pros and cons
+ No need to buy dust bags
+ Doesn’t lose it’s power
+ Effective cleaning
– Makes more noise than normal vacuum cleaners
– All the plastic made it feel a little cheap at first
– Might fall when not used because it doesn’t weight much
So I hope to be using this one for the next 10 years. I don’t regret buying it and every time I vacuum I like it more. Do I vacuum more often with this, well that’s a totally different story.


