Pikamulkaus Beauty salon
Hei.
Tällä kertaa Pikamulkaus blogissa tehdään kauneushoito autolle. Teemme sen myös kokonaan itse emmekä käytä ulkopuolisia tahoja. Autona toimii oma 3 vuotta vanha Mazda 6 2.0 Sportwagon. Auto on jäänyt pesemättä kurakelien takia aika kauan ja viime perjantaisen TopGear Live Show reissun jälkeen se oli ikkunoiden yläreunoihin asti kurainen. Vahauskin on jäänyt aika vähille ja menty liian pitkään vain pikapesujen vahoilla. Mikään auto ei ansaitse tuollaista pitoa, joten asialle täytyi tehdä jotain. Lisäksi autossa oli yksi lisähaitta. Kesällä oli joku paksumpi oksantynkä raapinut takapuskuriin todella ikävän näköisen naarmun. Eli tällaisen:
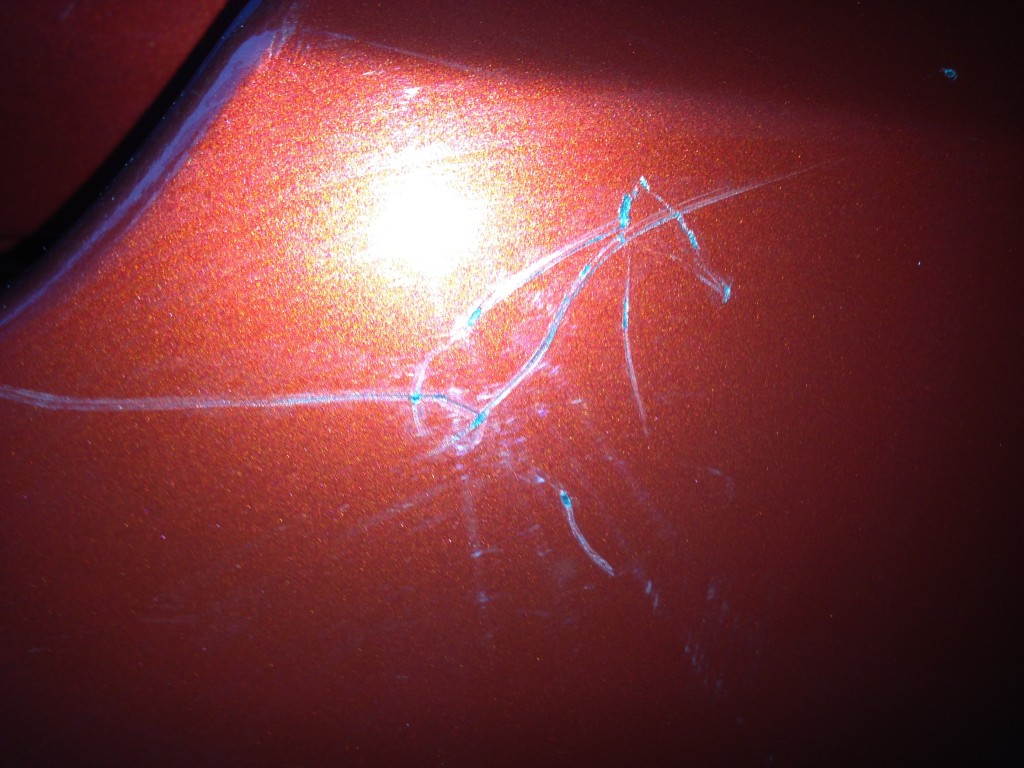
Tuolle naarmulle pitää todellakin tehdä jo jotain mutta listataan ensin projektin kaikki vaiheet. Äskeinen valokuva on otettu pesun jälkeen.
- Auton pesu
- Naarmun korjaaminen
- Auton vahaaminen
Auton peseminen
Kaikki kauneuskäsittely alkaa sillä, että kohde puhdistetaan. Tässä autossa siihen olikin todellinen tarve, joten pesulaan mars. Helpoimmalla pääsee kun ajaa auton harjattomaan tai pehmoharjaiseen autopesulaan. Tämä käsittely on kuitenkin hyvin usein liian pintapuolinen. Nyt kun tarkoituksenamme on antaa autolle oikein hyvä kauneuskäsittely, pesemme auton käsin. Auto ajettiin siis talliin, joka on tarkoitettu autojen pesemiseen. Auto huuhdellaan läpikotaisin lämpimällä vedellä ja täytetään lämmintä vettä myöskin ämpäriin. Ampärissä olevaan veteen kaadoimme noin 1.5 dl Korrek autonpesuainetta. Harjana meillä oli käytössä hyvin pehmeäharjainen ja teleskooppivartinen harja.
Harja ämpäriin ja siitä mahdollisimman märkänä auton katolle. Peseminen aloitetaan aina ylhäältä alaspäin (jos joku ei tätä vielä ole hoksannut) koska valuva vesi puhdistaa samalla alhaaltapäin. Toisinpäin tehtynä kuravesi valuisi jo puhdistetuille pinnoille. Jokainen pinta jynssätään mahdollisimman märällä harjalla ja runsaalla pesuaineella, kuitenkin varoen tekemästä naarmuja. Aivan viimeisenä pestään vanteet ettei niistä mahdollisesti irtoava lika ja rasva leviä muualle. Korrekin autonpesuaineessa on mukana hieman vahamaista ainetta, joten auto on huuhdeltava lämpimällä vedellä heti pesemisen jälkeen, ettei vaha kuivu tahroina auton pinnoille.
Lopuksi auto kuivataan säämiskällä, kestopaperilla tai puuvillaisella liinalla.
Naarmun korjaaminen
Auto on nyt siis puhdas ja siirrymme sen viheliäisen naarmun kimppuun. Lyhyesti sanottuna naarmua pitää hieman ensin rapsuttaa metalliharjalla (loput liat pois ja loivemmat reunat), maalata naarmun kohdalta ja lopuksi pistää päälle lakkapinta. Pikamulkaus teki tässä nyt niin, että Metro-autosta haettiin (etukäteen luonnollisesti) oikealla värikoodilla oleva meikkipuikko paketti. Tähän pakettiin kuului sekä maali- että lakkapuikot. Maalipuikossa oli lisäksi tuo pieni metalliharja, jolla naarmun sai rapsutettua.
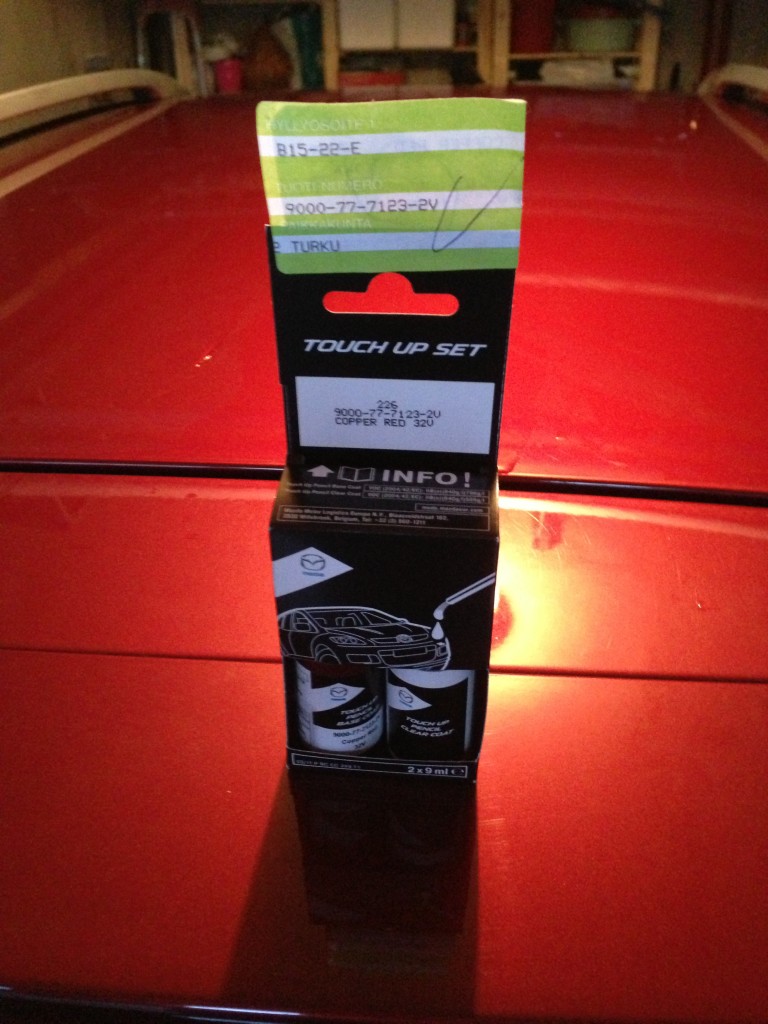
Korjaamiseen tarkoitettuja meikkipuikkoja saa toki Biltemasta, Motonetistä ja monesta muusta autotarvikkeita myyvästä liikkeestä. Mennään kuitenkin eteenpäin. Ensin naarmu siis rapsuteltiin varovasti. Sen jälkeen maalipuikkoa ravisteltiin pari minuuttia. Suti oli samanlainen kuin naisten kynsilakkapurkissa ja sillä varovasti töpöteltiin ja vedettiin maalia naarmun suuntaisesti. Tässä kohtaa tietysti sitten huomataan viimeistään, oliko maali oikeaa sävyä. Onneksi oli ja naarmu saatiin peitettyä. Se ei kuitenkaan ollut aivan kokonaan piilossa vielä tällä käsittelyllä, olihan kyseessä kuitenkin aika syvä ja inhottavan näköinen naarmu. Maalin piti antaa kuivua puoli tuntia, joten tässä vaiheessa oli hyvä pitää ruokatauko.
Seuraavana vuorossa oli puhdistaa maalipinta hellästi jollain liinalla. Tämän jälkeen otettiin paketissa ollut lakkapurkki ja samanlaisella pensselillä kuin maalipuikossa, levitettiin lakkaa maalatulle pinnalle. Tämä suojaa maalattua kohtaa ja näkyi myös pehmentävän vanhan ja uuden maalin kontrastia. Tältä naarmu näytti maalauksen ja lakkakäsittelyn jälkeen.
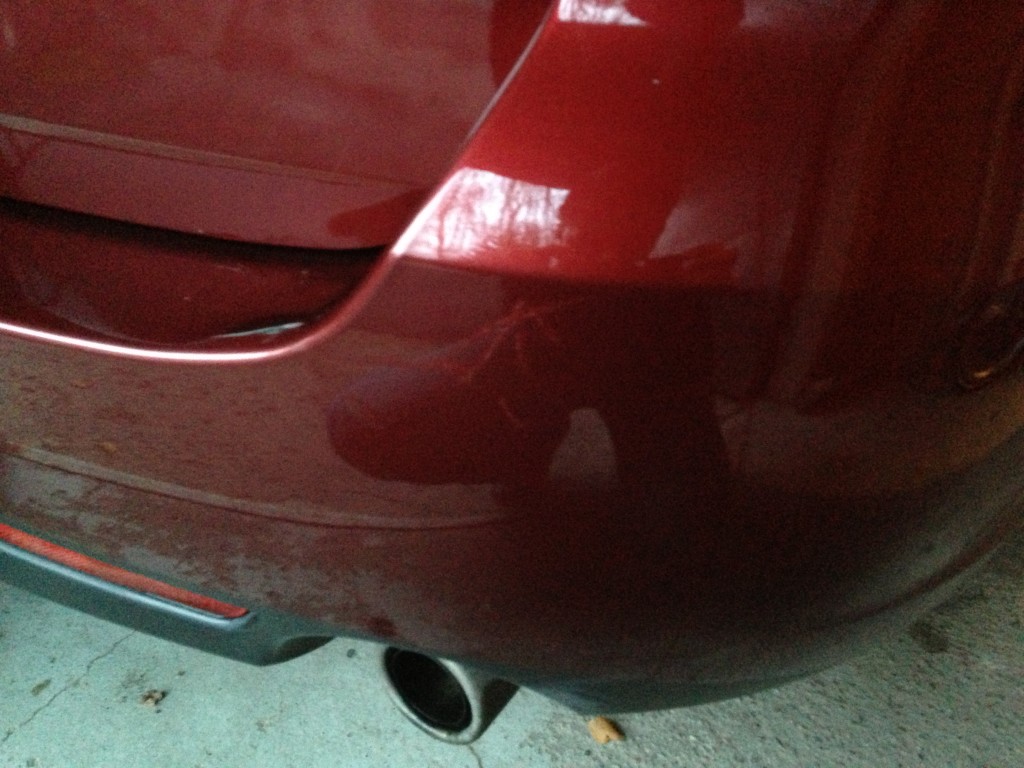
Naarmu oli siis miltei näkymättömissä. En sitten tiedä olisiko vielä suurempi maalimäärä auttanut enemmän. Verrattuna lähtötilanteeseen puskuri oli kuitenkin nyt paljon paremman näköinen. Lisäksi päällä oli nyt suojaava lakkapinta.
Vahaaminen
Auto oli nyt pesty ja naarmu korjattu. Siirrymme auton pintojen kauneuskäsittelyyn eli vahaamiseen. Olen aina ollut jotenkin mieltynyt AutoGlym:in vahaustuotteisiin ja niitä aioin käyttää myös tällä kertaa. Niillä olen aina saanut hyvän lopputuloksen.
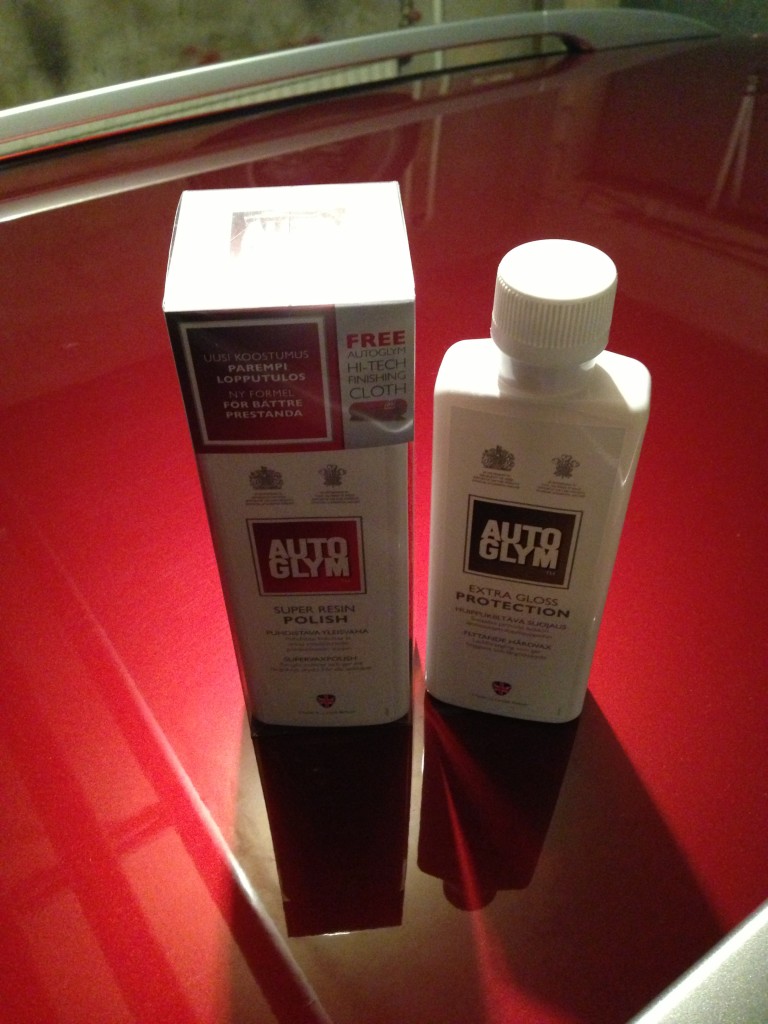
Vahaustyö on kaksivaiheinen ja tarvitsee kaksi erillistä vahaa sekä aikaa. Ensin tavallinen kiiltovaha levitetään pyörivin liikkein puhtaille, maalatuille pinnoille. Tässä kohtaa on myös hyvä varoa mustia osia ja laseja niin pääsee jatkossa helpommalla. Levitys tehdään joko puuvillaliinalla, trasselilla tai vahaukseen tarkoitetuilla tyynyillä. Me käytimme jotain suhteellisen edullista levitystyynyä, jossa oli irroitettava kädensija. Vahaa ei kannata levittää liian moneen paikkaan kerrallaan, koska se tahtoo sitten kuivua liian tiukkaan. Oma tapani on käsitellä ensin katto ja konepelti, sitten kiillottaa ne. Tämän jälkeen käsitellään etupää ja toinen kylki ja kiillotetaan ne. Lopuksi perä ja jäljellä oleva kylki.
Kiillotus tehtiin tällä kertaa AutoGlym paketin mukana tulleella hienolla liinalla. Eli liinalla kiillotetaan vahatut kohdat pyörivin liikkein niin kauan, ettei valkoista vahaa enää näy. Kun koko auto on käyty läpi, pitäisi sen näyttää jo mukavan kiiltävältä. Jos autoa ei ole vahattu pitkään aikaan voi käsittelyn tehdä vielä halutessaan uudelleen.
Meille riitti nyt kuitenkin yksi käsittely, koska viimeinen vaihe oli vielä jäljellä. Jos autolleen haluaa erityisen hyvän kiillon ja vielä sellaisen joka kestää pidemmän aikaa, kannattaa tavallisen vahauksen jälkeen levittää kestävä kovikekiilto. Tämä luo auton pinnalle hyvin kovan ja sileän pinnan, joka kiiltää niin että varmasti kaikki ohikulkijat huomaavat.
Tämä aine on hyvin juoksevaa, joten sen kanssa kannattaa olla hieman varovainen. Ainetta kaadetaan pehmeälle liinalle (ei kuitenkaan siihen kiillotusliinalle, AutoGlymillä on hyviä pehmopapereita joita mekin tässä käytimme. Puuvillaliina käy ihan yhtä hyvin.) Ainetta levitetään pinnoille liinalla. Sitä ei saa painaa ja tässä ei tarvitse pyöritellä, kunhan ainetta tulee joka paikkaan. Koko auton voi käsitellä samalla kertaa, koska kiillotusta ei tehdä vielä tässä vaiheessa.
Kun kaikki pinnat on käsitelty, auto näyttää suunnilleen tältä:
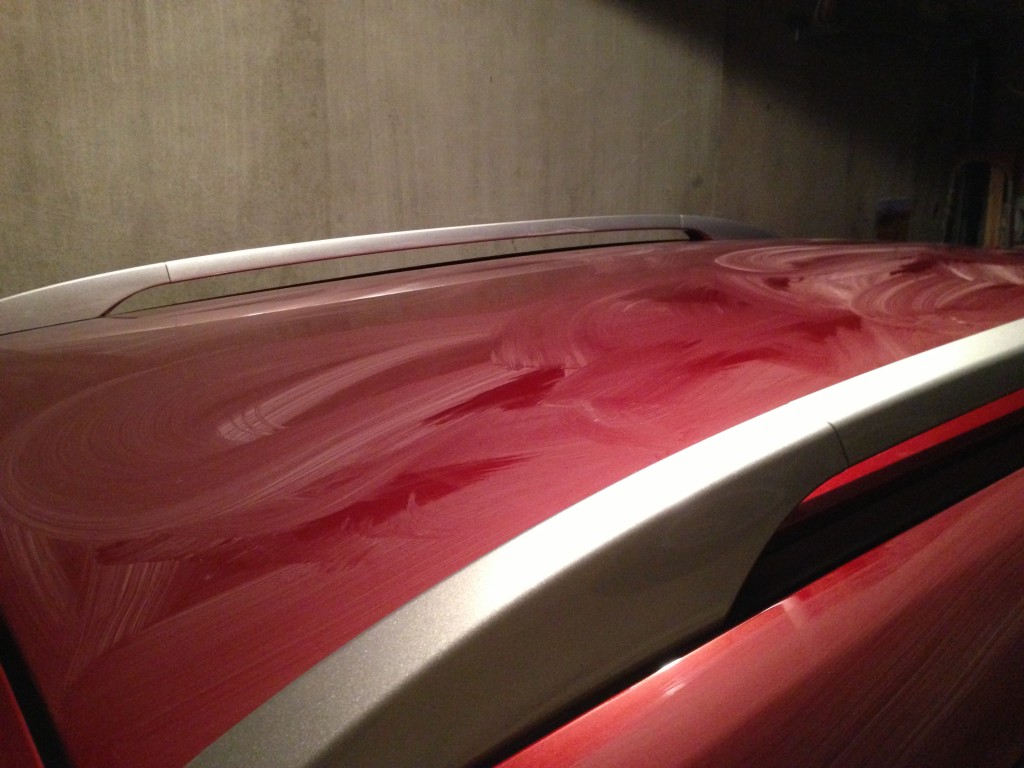
Ensimmäinen hoitopäivä on sitten tehty. Auto jätetään tuon näköisenä talliin tai muuhun paikkaan jossa ei ole auringonpaistetta eikä kosteutta (käytönnössä siis autotalli) yön yli.
Seuraavana aamuna tai päivänä sitten sillä samalla kiillotusliinalla pyyhitään kaikilta pinnoilta tuo valkoinen töhnä pois. Tämän jälkeen käsittely on valmis ja meidän käsittelyssä ollut auto näytti tältä:
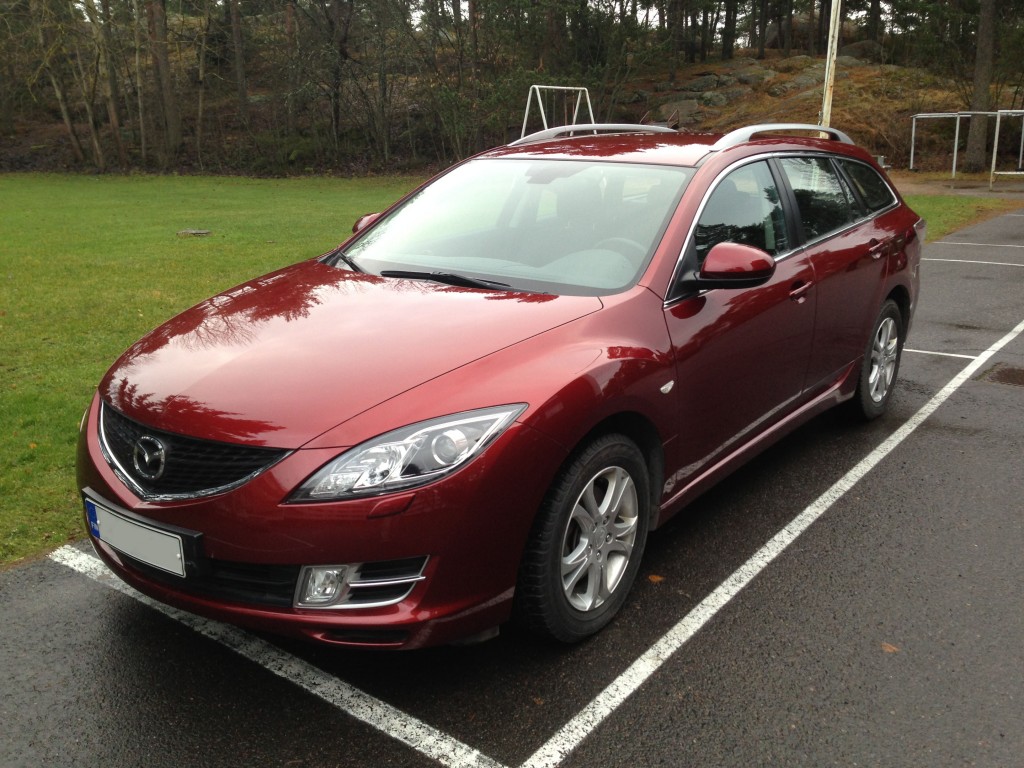
Auto siis kiiltää varsin mukavasti. Vielä kun olisi ollut kuvaushetkellä auringonpaistetta niin olisi tarvittu aurinkolasit katsomiseen. Mutta mites sitten kävi sille naarmulle?
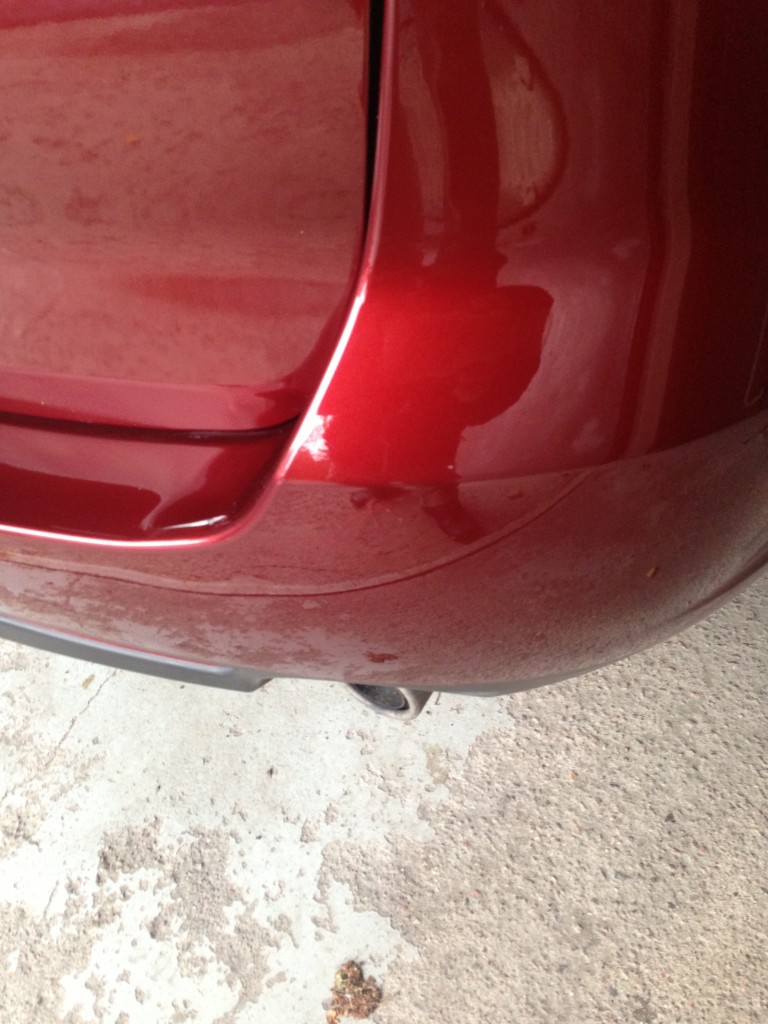
Eipä ole naarmua enää juurikaan näkyvissä. Kauneushoito on siis valmis. Nyt on enää vuorossa kierros kaupungilla ja ajella tyytyväinen virne naamallaan ja nauttia kuinka ihmisten päät kääntyvät ohi ajettaessa.
Seuraavalla kerralla siirrymme auton sisätilojen siivoukseen ja testaamme erään ostamamme uuden tuotteen.
English
Hi.
This time at Pikamulkaus we give a beauty treatment for my car. We do it totally ourselves and not use any external firms. The test car is my own 3 year old Mazda 6 2.0L Sportwagon. I have neglected washing my car for too long and after the trip to the TopGear Live Show last friday it was covered in dirt up to the roof. I haven’t waxed my car either for quite some time and even then it has been the wax from the automatic carwash. No car deserves that kind of keeping so I just had to do something about it. Besides that, there was one more thing bugging me. During summer some kind of a tree branch (or at least I think it’s caused by something like that) have made a really nasty scratch on my rear bumper. It looked like this:

That is something that really needs to be taken care of but first I list the phases of this project. The picture you just saw was taken after the washing. Just saying.
- Washing up the car
- Fixing up the nasty scratch
- Car waxing
Washing up the car
Every beauty treatments begin with cleaning up the target. There was definitely a need for that in this car so off to the washing place we go. It would be easiest just to drive through the carwash but the result on those are not as good as we want it to be this time. So we’re going to hand wash the car to give it a proper beauty treatment. So we drove the car to a garage meant for car washing. First you rinse the car with warm water ja also fill a bucket with that water. Then we poured about 1.5 dl of Korrek autoshampoo to the water in the bucket. We had a brush with very soft hair and a telescopic arm.
Sink the brush in to the bucket and with as wet as possible, move it to the roof of the car and start washing and move from up to below. Brush all the surfaces with wet brush and as much shampoo as possible, but be careful not to scratch the car. Last thing you wash it the rims since they have sand and grease which you don’t want to spread anywhere else. The Korrek autoshampoo has some wax-like substance in it so you need to flush the car as soon as you’re finished with washing. Otherwise you might get some stains if it dries up.
Lastly you dry up the car with a shammy leather, cotton cloth or with a soft paper cloth.
Fixing up the scratch
The car is now clean and we move on to that troublesome scratch. Shortly said we need to scratch is little more with a metallic brush first (deeper clean and more gentle edges), paint on the scratch and then put some varnish on top. We at Pikamulkaus did so that we ordered a package from the Mazda dealer which had a paint with the correct color code and the varnish. The paint bottle also had a little metallic brush.

Naturally there are many places where you can order this kind of paint bottles. We wanted to make sure the color was a perfect match and went with the Mazda ones. Let’s move on though. At first we brushed the scratch gently. After that we were shaking the paint bottle for two minutes and then we spread the paint over the scratch following it’s lines. This is the time where you finally notice if you got the right color shade, luckily we had and we were able to cover the scratch. After this treatment it was still kind of visible and not in a satisfying condition. It was deep though. Paint needs to dry up for 30 mins so this was a good time to go and have something to eat.
Next it was time to clean the just painted surface with a cloth. Then we took the varnish bottle from the bottle and with a similar brush than in the paint we spread the substance on the painted scratch. This will cover the painted place and it also seemed to soften up the contrast between the old and new paint. This is how it looked like after the treatment.

So the scratch was almost gone. I don’t know if I should have put even more paint on it to make it even more invisible. Compared to scratch we started with is was much better looking. Besides that it now had a protective layer on top.
Waxing
Car was now washed and the scratch was fixed. We now moved on to the beauty treatment of the surfaces…waxing. I have always liked the performance of AutoGlym products and so I intended to use them this time too. I’ve always managed to get a good result with them.

Waxing is done in two phases and the job need two different waxes and some time. First the regular shine wax is spread to the clean surfaces with rotary motions. Be careful of the black surfaces and glass, you’ll get it easier on the next phase. Spreading is done with a cotton cloth, cotton waste or with a soft pad made for waxing purposes. We used a reasonably priced pad which had a removable handle. Don’t spread the wax in too many places at ones because it tends to dry up too much. My way is to wax the roof and hood first then polish those. Then wax the front and one of the sides and polish them. Last wax the rear and the remaining side and polish them.
The polishing is done with the soft cloth provided in the AutoGlym package this time. Polish the waxed surfaces with rotary motions so that there is no white wax visible. After you’ve gone through the whole car it should look pretty shiny already. If you haven’t waxed your car for a long time and you have the time, you can wax it one more time.
One waxing was enough for us this time because there was still one phase left. If you really want your car to have a really bright shine and want it to last longer, you should put a hard finishing polish on top. This makes a very hard surface on the car and so shiny that it attracts every passer-by.
This substance is very fluid so be careful with it. Pour the stuff in a soft cloth (not the one you used for polishing, AutoGlym has also some soft paper for this usage and we used that). Spread the polish to all the surfaces with the cloth. There is no need to use rotary motions, just make sure it goes everywhere. Also don’t press it, just use light motions. You can work through the whole car at once since we’re not going to polish it yet.
After you’ve done it all, the car looks like this:

This was the end of the first treatment day. You leave the car looking like that in a garage over night or to another place where sun isn’t shining and no moisture can get to it. Garage it is.
On the next morning or day you go through the car with the polishing cloth and wipe all that white stuff away. After this you’re done and the car we were working with looked like this:

Mazda had a pretty nice shine. If there was some sunshine when the photo was taken, there would have been a need for sunglasses when looking at the car. But what was the situation with the scratch?

The scratch is hardly visible now. So the beauty treatment is now complete. Only thing left now is a round in the city and drive with a satisfied grin and see how people’s heads are turning while you pass them.
Next time we move to the interior cleaning and we test a new product we bought.




Moi, löysinpä taas pitkästä aikaa näille sivuille ja selasin jutut mielenkiinnolla läpi. Mukavasti luettavaa ja ymmärrettävää tekstiä. Tämä uusin juttu auton kauneudenhoidon vaiheista on hyvä ja hyödyllinen.
Saman tyyppistä tarinaa vaan, kiitos!